Do-It-Yourself garage floor coating kits gone bad: What's the deal?
As it pertains to your honey-do list, the allure of saving a buck by picking up material at your local hardware store and following directions off Pinterest can be quite high. - Especially if you've already shopped around and received bids from respective trade professionals. - With that said, there's a big difference between tacking up a few tongue-and-groove planks in the mud room to get the pottery barn shiplap look VS. throwing down some box-store garage floor paint and expecting to achieve the sharp looking work space you've aways wanted.
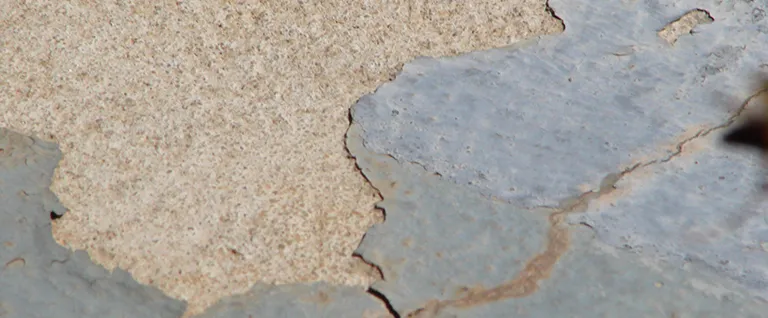
If you've already done the latter of those two DIY projects, like many of our existing clients, there's a good chance your garage floor coating is cracking, peeling or bubbling. Rest assure that concrete coating failures happen to everyone; professionals included. Nonetheless, it happens a lot less to true floor coating professionals who know how to mitigate the risks and take all necessary steps to give you a high-quality concrete coating.
"The bitterness of poor quality lasts long after the sweetness of low price is forgotten."
Factors Affecting the Application Process
These are a few of the critical factors taken in to consideration by floor coating professionals during the application process; and could very well be the reason your DIY coating project is failing:
- Floor Preparation: Most DIY floor coating kits underemphasize the the importance of properly preparing the concrete floor prior to application. It takes much more than just power-washing and vacuuming. Most coatings, such as epoxy, will not adhere to a smooth surface. The floor must be ground to the correct Concrete Surface Profile (CSP) by a commercial-grade floor grinder or shot-blaster, which opens the pores and allows maximum adhesion.
- Contamination: The surface must be free of all waxes, oils, greases and other contaminants, even those invisible to the naked eye, which can decrease adhesions and increase chances of chipping, peeling or bubbling.
- Hydrostatic Pressure: It's not about the moisture that's IN your concrete, it's about the moisture moving THROUGH your concrete. As temperatures change around your concrete slab during any given day, moisture travels through it. If the right amount of moisture is wicking too quickly through your concrete slab, hydrostatic pressure will push the coating off the surface, causing it to blister and fail. - There are methods to combat this problem, but just like any endeavor, proper planning puts you in a better position to succeed. And the only real accurate way to determine how much moisture drive is present in a concrete slab is with a calcium chloride test.
- Product Mixing: If products are not mixed at the right ratios and for the right amount of time, prior to application, coatings are at risk of not curing properly, nor adhering properly.
- Material Grade: In most cases, there's a reason large box-store materials are sold at more discounted rates than those only available to certified contractors; it's more about quantity and less quality. Real floor coating professionals will use a tried and trusted product that has been engineered to perform.